
Carrying on the series of tutorials for making mosaics with children (that is good for very little ones as well as bigger kids), here is a lovely tea light holder for you to make that involves no cutting and materials that are readily available.
The key thing to notice here is the type of glue used. Working on a 3 d surface means that using ordinary craft glue is hard as the object you are sticking on will slide off. So, before I launch into the project, here’s some good to know info about silicone adhesive!
In this project we use clear silicone adhesive / caulk which is the stuff that is used around the edge of a bathtub (flexible, slightly squidgy even when dry). It is very tacky stuff so you won’t have to worry about tiles etc.. slipping off! It comes in various colours so make sure you buy the one that dries clear – it is white when it comes out of the tube. Builders / tilers will buy them in big tubes that require a metal ‘gun’ but you can also get silicone in squeezy tubes (the small ones sold for craft purposes / on mosaic sites are much more expensive than the stuff you buy in a DIY stores and I have never seen any advantage to warrant the extra cost). Lastly, a lot of silicone adhesive has a pongy smell so use it in a well ventilated area and not for long periods. However, I have discovered a tube of the stuff that is smell free and readily available (at least in the UK) called “Kitchen and Bathroom Sealant” from Wickes DIY. Enough about the properties of silicone glue! Here’s how you make your pretty mosaic tea light holder.
What you need:
- old jam jar / glass tea light holder etc…
- glass nuggets (available in pound / dollar stores / florists / Ikea / craft shops) mix of coloured and clear / translucent is nice so that candlelight shines through
- translucent (see through) silicone adhesive
- spreader
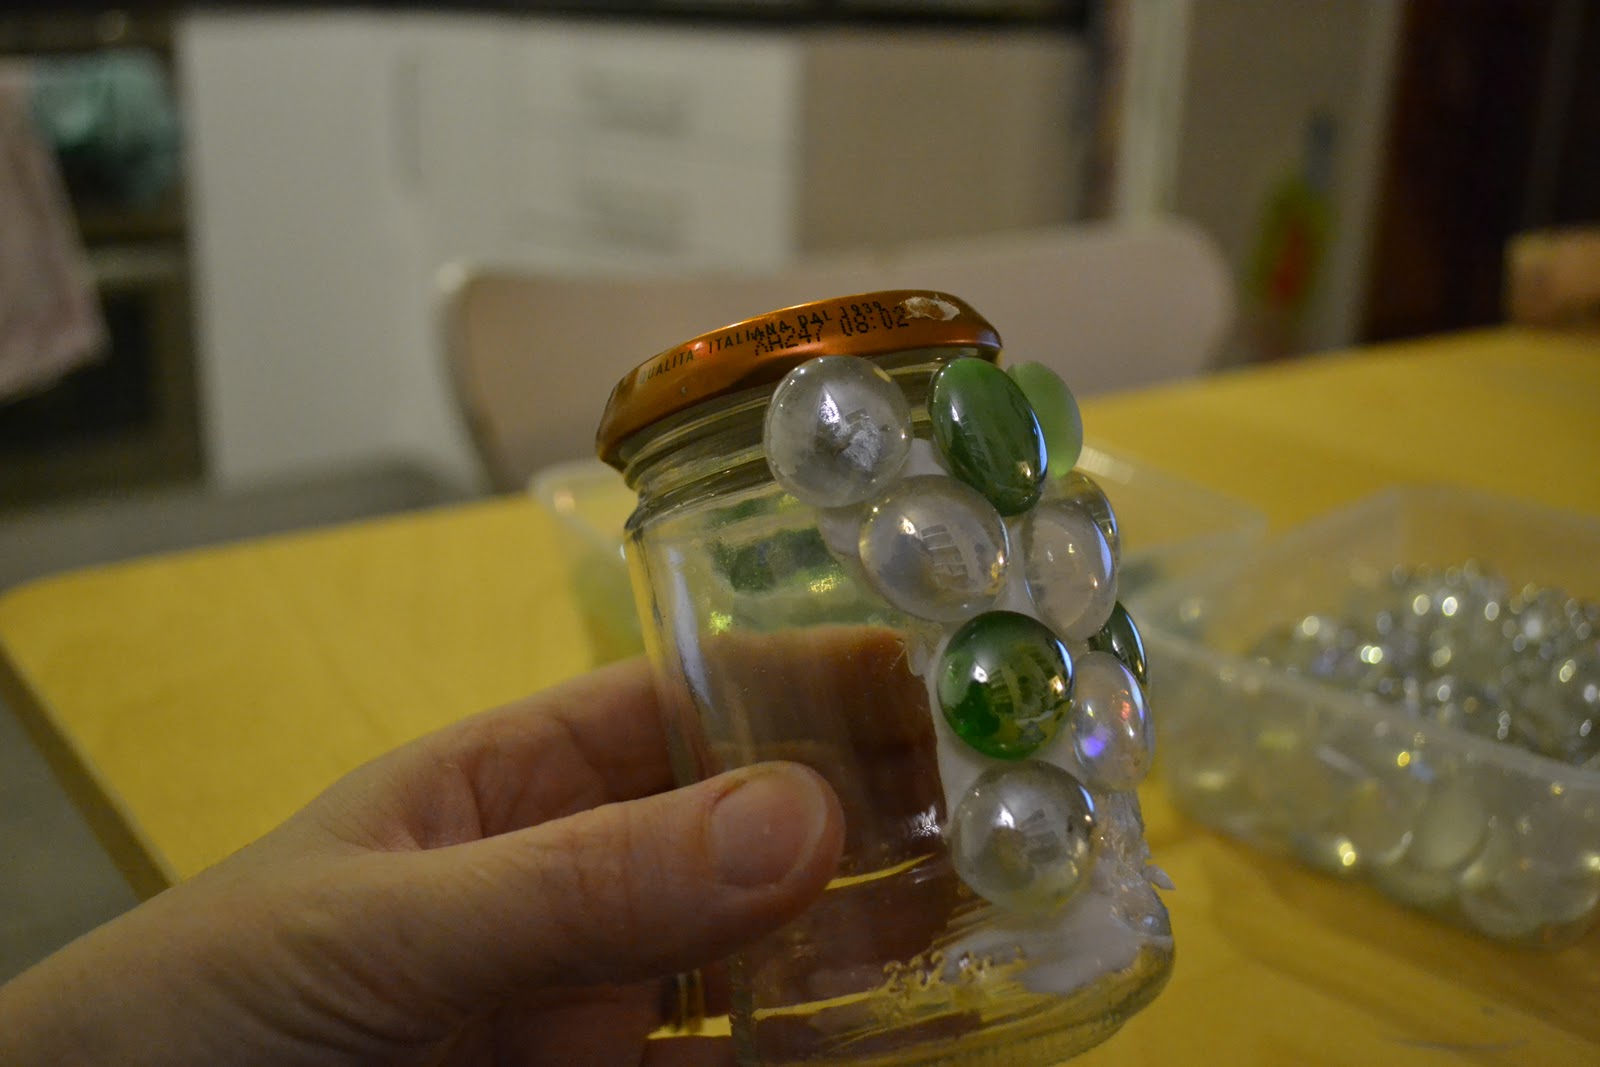
- Spread the glue quite thickly over the jam jar – work in section so that you can hold and rotate the jar.
- Embed the nuggets firmly in the glue.
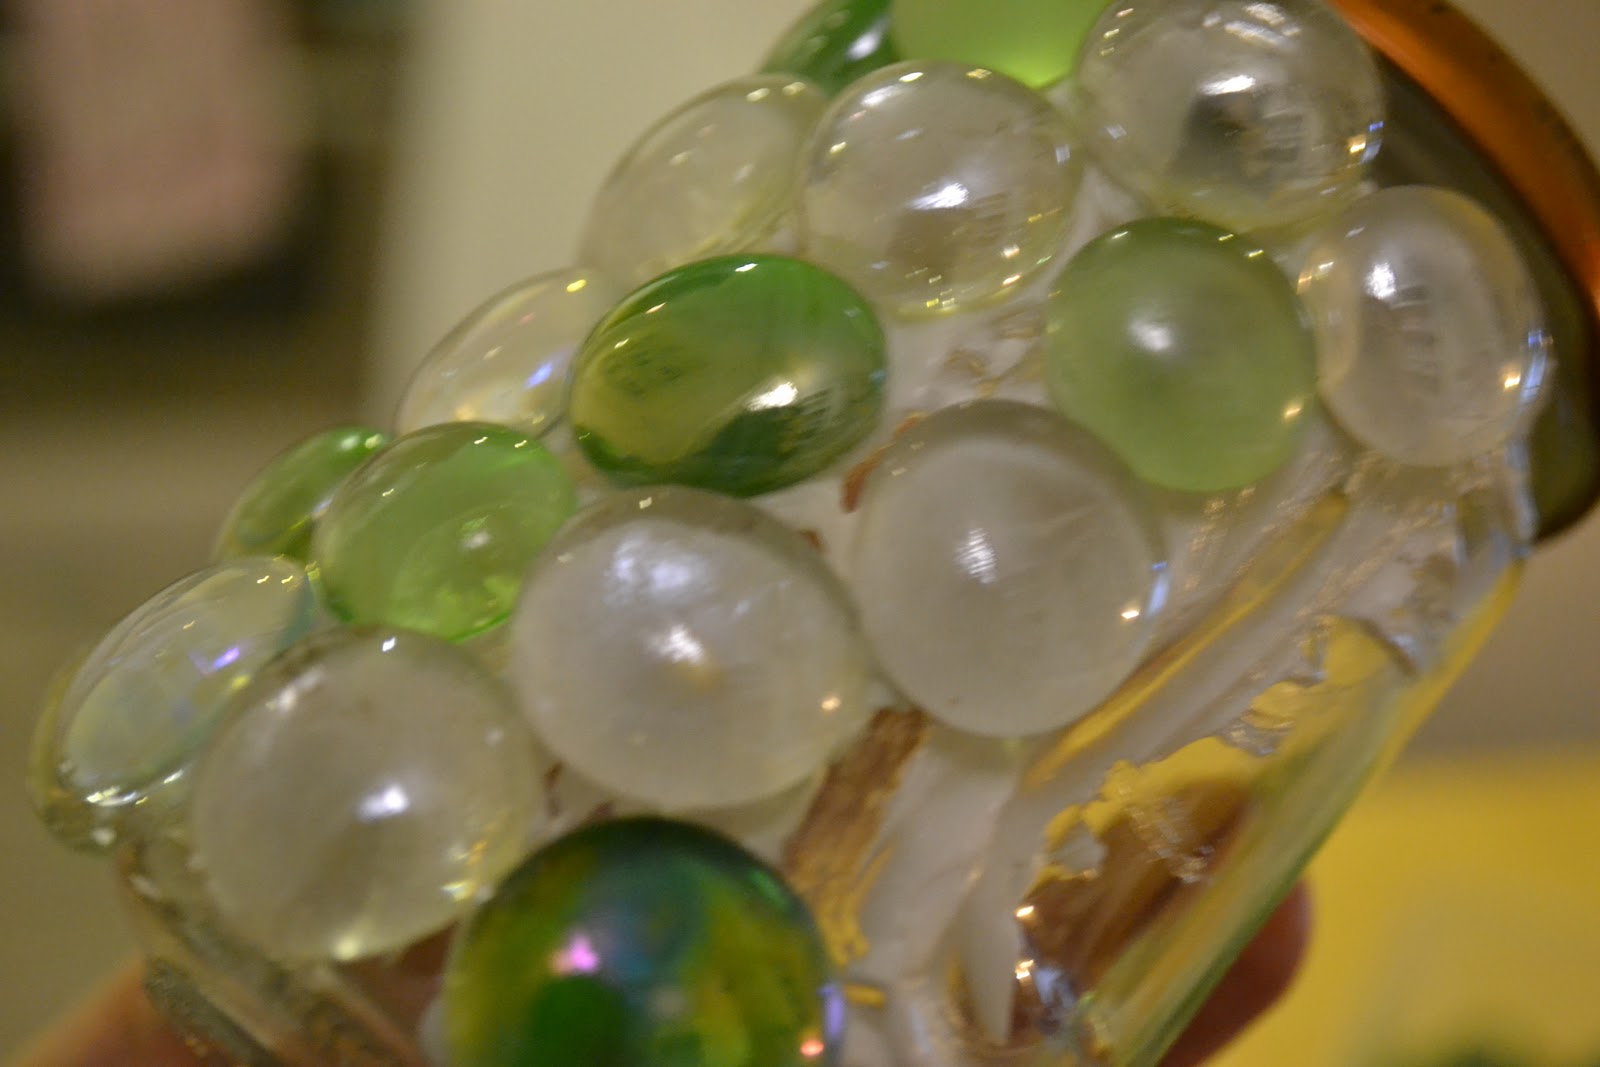
3. You will need to squish and move the nuggets around to fill the space without going over the edges.
4. Leave to dry – it will take a good couple of days to go clear.
5. If you want, you can grout it when it is dry – black grout is particularly effective
6. If you have used a jam jar, you can add some wire on the rim so that you can hang your mosaic tea light holder – we are going to make a few to hang out side once the warm nights come (can’t wait!).

We have left ours ungrouted and I love the way that the candle light catches the bubbles in the glass. Simple, pretty and a very easy mosaic project for children big and small (and adults of course!).
Have fun!
Just a quick note to let you know that a link to this post will be placed on CraftCrave today [26 Feb 12:00am GMT]. Thanks, Maria
I love it, I love it, I love it!!! Thank you. Plus I also have your 'celebrating each step' badge on my blog now and it worked – yay! 🙂
Amelia.x
Thank you Craft Crave and Amelia! Lovely that some Celebration spirit is sprinkling out!
Oh my! Thank you so much for sharing this … I just did this same project with my daughter this summer, only I used different adhesive. Needless to say we were taping on our rows of glass nuggets to prevent sliding. I will now feel comfortable doing this project again – with the right adhesive!
Hello Noel, you are most welcome! No more tiles sliding down for you!! Have fun making stuff.
Hi Concetta,
I’ve just had a quick look at your website, and will continue looking later. It’s really lovely, full of amazing ideas and beautiful creations.
Wendy
One day recently, I stumbled upon the online mystical world of mosaic tile artistry….for hours I have poured over various works, absolutely stunned and captivated, beginning with Sonia King. I want to start with my own hands…but, how, where do I begin?
hello and so sorry to take ages to reply.
Well, the best place to begin is Sonia’s book! Link on this page http://glitteringshards.com/mosaic-loving/
Experiment – have fun with it with no pressure to get it ‘right’. Mistakes are part of the process.
Next step is to find a good teacher / class. 😉 Where are you based?
Thanks so much for the fab tip about Wickes Kitchen and Bathroom Sealant.. I have bought some and looking forward to making ^this project^ and some of my own. Exciting! Awesome site.
Lucy x:)x
Thank you so much for your website and this great project! I found it when looking for a craft for 6-8 year old girls. I live in the US, and could not find the adhesive you suggested. I wanted to share what I found.
After much searching and experimenting to find something that worked well and did not have multiple warnings about keeping it out of reach of children, I found Alenee’s Turbo Tacky Glue works really well. Also, rather than round jars, I bought a small, square clear glass vase ($1 each at Dollar Tree) for each girl.
We did the project on a warm, sunny day (about 80 F/27 C). I had them turn the vase such that the side they were working on was horizontal. After they finished one side, we placed it in the sun for about 20 minutes. That made the glue set enough that we could turn the vase 90 degrees and work on another side. We repeated this process for all 4 sides. (In between, the girls played games and did other activities.)
The girls really enjoyed it, and were very happy with the final result. The moms also commented on how beautiful they turned out.
Thank you!
Heya i’m for the primary time here. I found this board and I to find It really useful & it helped me out a
lot. I hope to gie somethibg back and aid others like you helped me.
How long does the glue last once the tea lights are lit, does it melt after a time. My friends children want to make these for an evening party, their mom doesn’t want melted glue and glass beads everywhere.
I was suggested this blog by my cousin. I am noot sur wether this post is written by him aas
nobody else know such detailed about mmy trouble. You’re wonderful!
Thanks!
I see you don’t monetize your website, don’t waste your traffic, you can earn additional
cash every month because you’ve got hi quality content.
If you want to know how to make extra $$$, search for:
best adsense alternative Wrastain’s tools
I have checked your site and i’ve found some duplicate content, that’s why you don’t rank high in google’s search results, but
there is a tool that can help you to create 100% unique articles,
search for: Boorfe’s tips unlimited content